ZeroY Studio

What Are the Main Parts of a Baseball Cap? A Complete Guide for Custom Hat Buyers

Choosing a baseball cap for custom production is not only about selecting a color and adding a logo. Every part of a baseball cap — from the crown and brim to the closure, sweatband, eyelets, and stitching — affects the final look, comfort, durability, and branding result.

For brands, distributors, sports teams, promotional product buyers, and OEM/ODM customers, understanding the main parts of a baseball cap can help you make better decisions before placing a bulk order. The right cap structure can improve logo presentation, wearing comfort, production stability, and overall brand value.

In this guide, we will explain the main components of a baseball cap and show how each part affects custom hat design and manufacturing.


Quick Answer: What Are the Main Parts of a Baseball Cap?
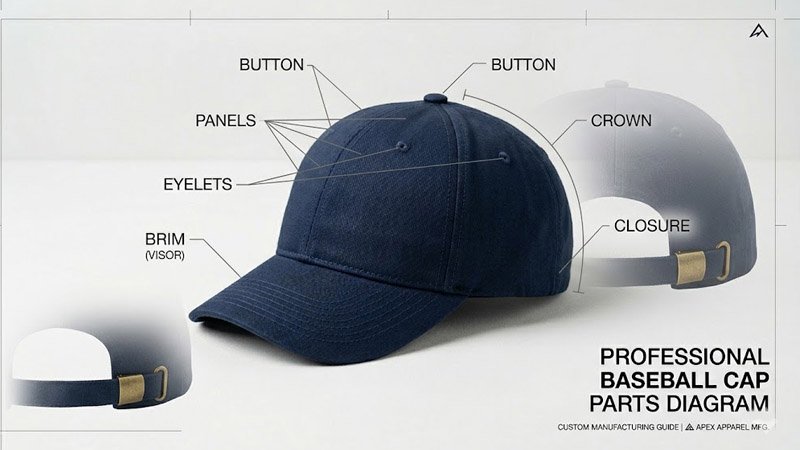
Main parts of a baseball cap including crown panels brim eyelets button and closure

The main parts of a baseball cap include the crown, panels, brim or visor, closure, eyelets, sweatband, top button, seams, stitching, and logo decoration areas.

For custom baseball caps, these parts are not just design details. They directly affect the cap’s shape, fit, comfort, ventilation, durability, logo placement, and final production quality.


Why Baseball Cap Parts Matter for Custom Buyers
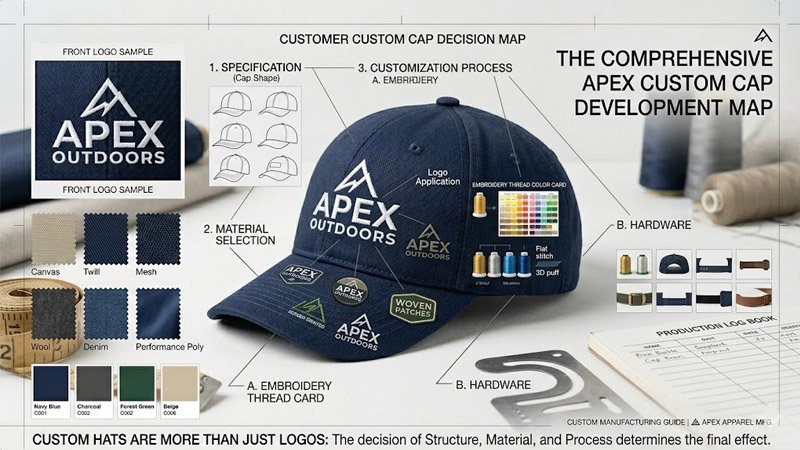
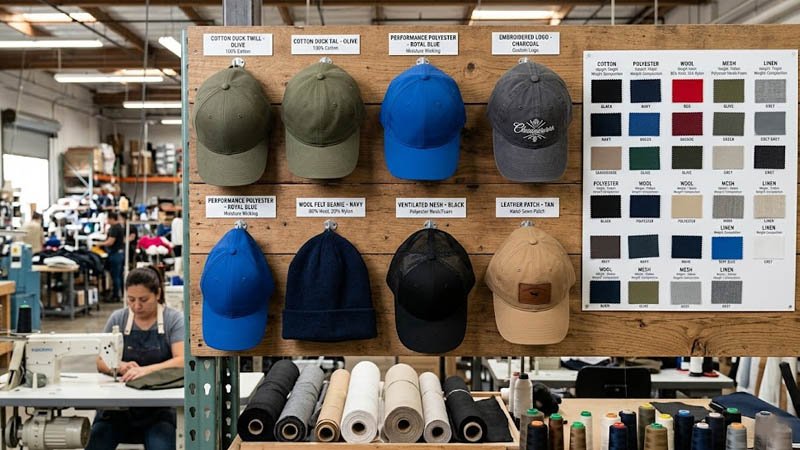
Custom baseball cap samples with fabric swatches color cards and embroidery threads for bulk buyers

When buyers customize baseball caps, they often focus first on the logo and color. However, the structure of the cap is just as important.

A structured crown can make embroidery look cleaner. A curved brim can create a classic sports look. A snapback closure can fit more head sizes. A moisture-wicking sweatband can improve comfort for outdoor or sports use.

For bulk orders, choosing the wrong cap parts may lead to problems such as poor logo presentation, uncomfortable fit, weak structure, or a product that does not match the target market.

That is why understanding each part of a baseball cap is important before custom production begins.


1. Crown: The Main Body of the Baseball Cap
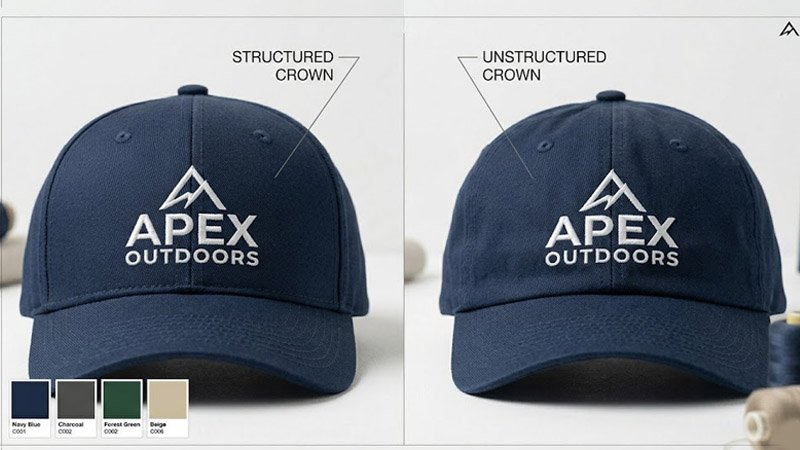
Structured and unstructured baseball cap crown comparison for custom hat production

The crown is the main body of the baseball cap. It covers the top of the head and gives the cap its overall shape.

The crown affects:

For custom caps, the crown is usually the most important area because it is where the main logo is placed.

A firm and well-shaped crown gives the cap a clean, professional appearance. A softer crown creates a relaxed and casual style.


2. Panels: 5-Panel and 6-Panel Construction

The crown is made from several fabric panels sewn together. Most baseball caps use either a 5-panel or 6-panel structure.

5-Panel Baseball Cap

A 5-panel cap usually has one large front panel without a center seam. This makes it suitable for large front logos, patches, and printed artwork.

A 5-panel cap is often used for:

Because the front panel is smooth and uninterrupted, it gives more space for clean branding.

6-Panel Baseball Cap

A 6-panel cap has six fabric sections, usually with a center seam on the front. This is the most classic baseball cap construction.

A 6-panel cap is commonly used for:

If you want a classic baseball cap shape, a 6-panel structure is usually the safest choice.


3. Structured vs. Unstructured Crown

Another important choice is whether the cap should be structured or unstructured.

Structured Crown

A structured crown has inner support, especially in the front panels. It keeps the cap shape firm and upright.

Best for:

Factory Tip: For large front embroidery or 3D embroidery, a structured front panel usually provides better support and helps the logo stay clean during stitching.

Unstructured Crown

An unstructured crown is softer and more relaxed. It does not have strong inner support, so it fits closer to the head.

Best for:

Unstructured caps are comfortable and fashionable, but they may not be the best choice for heavy or raised embroidery.


4. Crown Profile: High, Mid, and Low
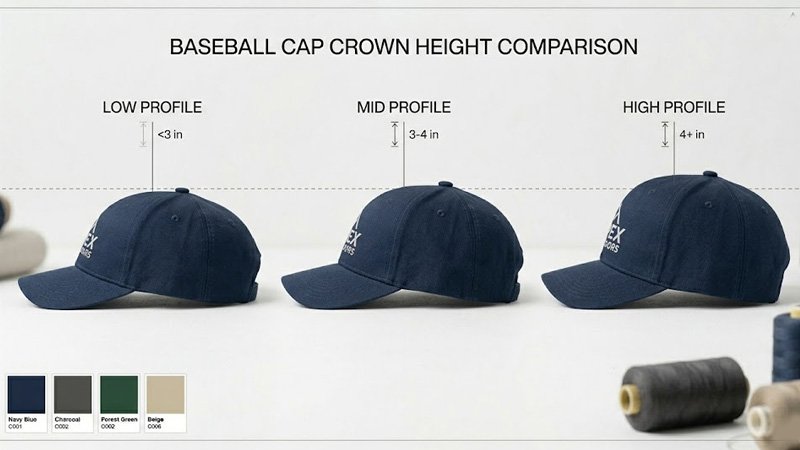
High mid and low profile baseball caps comparison for custom hat design

The crown profile refers to the height of the cap when worn. It affects both fit and style.

High-Profile Caps

High-profile caps have a taller crown and a bolder look.

Best for:

Mid-Profile Caps

Mid-profile caps offer a balanced shape that suits most users.

Best for:

Low-Profile Caps

Low-profile caps sit closer to the head and create a softer, more casual appearance.

Best for:

For custom buyers, the crown profile should match the target market and logo style.


5. Brim or Visor: Function and Style

The brim, also called the visor, extends from the front of the cap. It protects the face from sunlight and strongly affects the style of the cap.

The brim can be flat, curved, or pre-curved. It can also be customized with contrast colors, sandwich layers, stickers, labels, or printed designs.


6. Common Brim Types

Flat Brim

A flat brim creates a modern, bold, and streetwear-inspired look.

Best for:

Curved Brim

A curved brim gives a classic baseball cap appearance. It is practical, comfortable, and suitable for daily wear.

Best for:

Pre-Curved Brim

A pre-curved brim is already shaped during production. It gives a natural, ready-to-wear look.

Best for:

Sandwich Brim

A sandwich brim has a contrast color layer between the upper and lower brim fabrics. It is a simple way to add brand color without making the cap look too complicated.

Best for:

Factory Tip: For bulk orders, buyers should confirm the brim shape and stiffness during sampling, because different markets may prefer different brim curves.


7. Closure: The Back Adjustment System
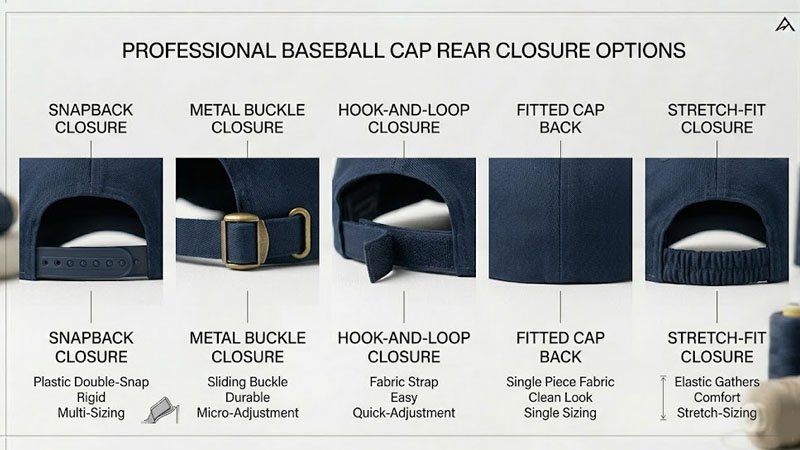
Baseball cap closure types including snapback metal buckle hook and loop fitted and stretch fit options

The closure is located at the back of the cap. It helps adjust the size and ensures a comfortable fit.

The closure type affects:


8. Common Baseball Cap Closure Types

Snapback Closure

A snapback closure uses a plastic adjustable strap with holes. It is popular, durable, and easy to adjust.

Best for:

Metal Buckle Closure

A metal buckle closure gives the cap a clean and premium look. It is commonly used for cotton dad hats and casual caps.

Best for:

Hook-and-Loop Closure

Hook-and-loop closure is easy to adjust and convenient for daily use.

Best for:

Fitted Cap

A fitted cap has no adjustable strap. It is made according to specific head sizes.

Best for:

Stretch-Fit Closure

A stretch-fit cap uses elastic material to fit different head sizes comfortably.

Best for:

Factory Tip: For promotional giveaways or event caps, adjustable closures such as snapback, hook-and-loop, or metal buckle are usually safer because they fit more head sizes.


9. Eyelets: Small Holes for Ventilation

Eyelets are the small holes on the crown of the cap. They allow air to flow through the cap and help keep the wearer cooler.

Common eyelet options include:

For cotton baseball caps, sewn eyelets are the most common. For outdoor caps or fashion caps, metal eyelets can add a stronger design detail.

Eyelets are especially important for summer caps, sports caps, outdoor caps, and promotional caps used in warm climates.


10. Sweatband: The Hidden Comfort Detail

The sweatband is located inside the cap, around the lower edge of the crown. It touches the forehead and helps absorb sweat.

Although it is not visible from the outside, the sweatband has a big impact on wearing comfort.

Common sweatband materials include:

For casual caps, cotton sweatbands are soft and comfortable. For sports and outdoor caps, moisture-wicking sweatbands are better because they help keep the wearer dry.

Factory Tip: Do not ignore the sweatband when developing custom caps for sports, outdoor events, or long-time wear. A poor sweatband can make the cap uncomfortable even if the outside design looks good.


11. Top Button: A Small Detail That Completes the Cap

The top button is located where the crown panels meet. It helps secure the panel structure and completes the appearance of the cap.

Common button options include:

A matching button gives a clean and classic look. A contrast button can add a small design highlight.

For some performance caps, a no-button design may be preferred because it feels more comfortable when worn under helmets or headgear.


12. Seams and Stitching: Details That Show Quality

Seams and stitching are important indicators of baseball cap quality. Clean stitching makes the cap look more professional and improves durability.

Custom buyers should check:

Poor stitching can make a cap look cheap, even if the fabric and logo are good. For brand buyers, these details directly affect the final product image.


13. Logo Placement Options on Baseball Caps

Logo placement is one of the most important decisions in custom baseball cap production. Different positions create different branding effects.

Front Logo

The front panel is the most common and visible logo position.

Suitable for:

For the best result, the logo size should match the crown height and front panel structure.

Side Logo

Side logos are usually smaller and more subtle.

Suitable for:

Back Logo

The back area can be used for small embroidery, woven labels, or brand names near the closure.

This is a good option when the front design needs to stay simple.

Brim Logo

The brim can be customized with embroidery, stickers, labels, or under-brim printing.

This works well for streetwear caps, sports caps, and fashion headwear.


14. Best Logo Methods for Custom Baseball Caps

Different logo methods create different visual effects. The right method depends on the logo design, fabric, cap structure, order quantity, and target market.

Flat Embroidery

Flat embroidery is one of the most popular logo methods for baseball caps. It gives a clean, durable, and professional look.

Best for:

3D Embroidery

3D embroidery creates a raised logo effect. It gives the cap a stronger and more premium appearance.

Best for:

Appliqué Embroidery

Appliqué embroidery uses fabric pieces stitched onto the cap. It is suitable for larger designs and fashion-style branding.

Best for:

Woven Patch

A woven patch is suitable for detailed logos and small text. It creates a neat and high-quality look.

Best for:

Leather Patch

Leather patches create a premium, outdoor, and vintage feeling.

Best for:

Heat Transfer Printing

Heat transfer printing is suitable for colorful designs, gradients, and detailed artwork.

Best for:


15. Why Embroidery Is Popular for Baseball Caps
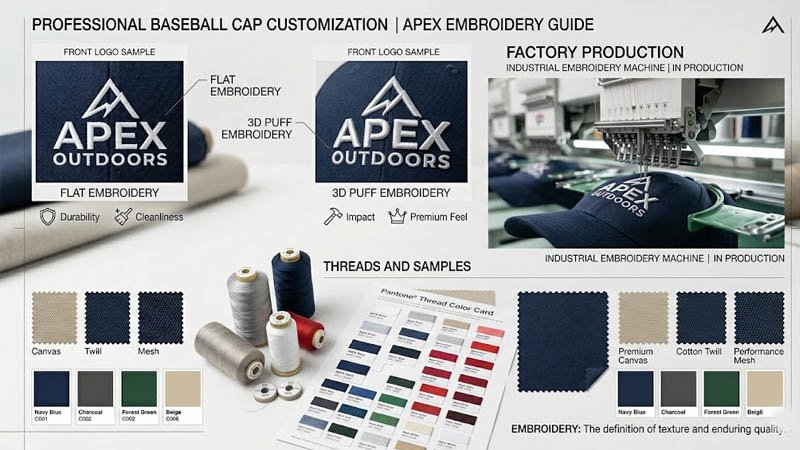
Embroidered baseball cap logo close up showing durable flat and 3D embroidery quality

Embroidery remains one of the most popular choices for custom baseball caps because it is durable, professional, and suitable for many types of logos.

Compared with simple printing, embroidery adds texture and a more premium feeling. It is especially suitable for corporate logos, team logos, brand names, and promotional caps that need long-lasting quality.

For baseball caps, embroidery works best on stable fabric and structured front panels. If the logo has bold text or simple shapes, flat embroidery or 3D embroidery can create a strong branding effect.

For very detailed artwork, a woven patch or heat transfer logo may be more suitable than direct embroidery.


16. Material Options for Custom Baseball Caps

The fabric affects the cap’s texture, comfort, durability, and price. Different materials are suitable for different markets and usage scenarios.

Material Best For Advantages
Cotton Dad hats, casual caps, corporate caps Soft, breathable, natural feel
Polyester Sports caps, promotional caps Durable, lightweight, colorfast
Nylon Outdoor caps, performance caps Lightweight, practical, outdoor style
Wool Blend Premium caps, winter caps Structured, warm, classic look
Mesh Trucker caps, summer caps Breathable and cost-effective

For most custom baseball caps, cotton and polyester are the most common choices. Cotton gives a natural and comfortable feeling, while polyester offers better durability and color stability for large promotional orders.


17. Baseball Cap Parts Overview

Cap Part Main Function Custom Options
Crown Defines cap shape and fit 5-panel, 6-panel, structured, unstructured
Panels Build the cap structure Front panel, side panels, back panels
Brim / Visor Sun protection and style Flat, curved, pre-curved, sandwich brim
Closure Adjusts cap size Snapback, buckle, hook-and-loop, fitted, stretch-fit
Eyelets Improve ventilation Sewn eyelets, metal eyelets, contrast color
Sweatband Absorbs sweat and improves comfort Cotton, polyester, moisture-wicking
Top Button Secures panels and completes the look Matching color, contrast color, no-button
Stitching Supports durability and quality Brim stitching, panel stitching, reinforced seams
Logo Area Displays brand identity Front, side, back, brim, closure label

18. How Different Buyers Should Choose Baseball Cap Parts

Different buyers have different needs. The right baseball cap structure should match the project purpose.

Buyer Type Recommended Cap Style Best Logo Method Key Focus
Corporate Buyers Mid-profile cotton cap Flat embroidery Professional and clean
Sports Teams Structured performance cap 3D embroidery or heat transfer Durable and comfortable
Fashion Brands 5-panel cap or snapback Patch or 3D embroidery Strong visual identity
Event Companies Adjustable promotional cap Flat embroidery or printing Cost-effective and flexible
Outdoor Brands Trucker cap or nylon cap Woven patch or leather patch Breathability and durability
Retail Brands Premium structured cap Embroidery or appliqué Quality and brand value

This table can help buyers choose suitable cap parts before confirming the sample.


19. Common Mistakes to Avoid in Custom Cap Production

Choosing the Wrong Crown for the Logo

A soft unstructured crown may not support heavy 3D embroidery well. If the logo is large or raised, a structured front panel is usually better.

Making the Logo Too Detailed

Small embroidery areas cannot show very fine details clearly. For detailed logos, woven patches or heat transfer printing may be better.

Ignoring the Sweatband

The sweatband affects comfort. For sports or outdoor caps, a better sweatband material can improve the wearing experience.

Choosing Fabric Only by Price

Low-cost fabric may reduce the final product quality. Buyers should consider the target market, usage, brand positioning, and budget together.

Not Confirming the Brim Shape

Different markets prefer different brim shapes. Some prefer flat brims, while others prefer curved or pre-curved brims. Always confirm the brim shape during sampling.

Skipping the Pre-Production Sample

For custom caps, a sample helps confirm the cap shape, material, color, logo size, embroidery effect, and overall quality before bulk production.


20. Why Work with an Experienced Custom Hat Manufacturer

For custom baseball cap projects, a reliable manufacturer can help buyers avoid many production problems and improve final product quality.

GUANGZHOU EASTLUCKY Hat & Garment Co., Ltd. is a high-end custom hat and OEM/ODM manufacturer based in Guangzhou, China, with 15 years of expertise in professional R&D, production, and distribution of various hats and embroidered accessories. Guided by the philosophy “Quality as Root, Innovation as Soul,” we provide global clients with one-stop solutions from design sampling to mass production, enabling efficient and high-quality supply chain services for brands.

An experienced factory can support:

This is especially important for brands, distributors, event companies, sports teams, and promotional product buyers who need stable quality and reliable delivery.


Conclusion

The main parts of a baseball cap include the crown, panels, brim, closure, eyelets, sweatband, top button, seams, stitching, and logo decoration areas. Each part affects the cap’s structure, comfort, style, durability, and branding result.

For custom buyers, a baseball cap is more than a simple accessory. The right crown can improve logo embroidery. The right brim can create the correct style. The right closure can fit more users. The right sweatband can improve comfort. The right logo method can make your brand look more professional.

Before placing a bulk order, buyers should confirm the cap structure, material, crown profile, brim shape, closure type, logo method, sample quality, and packing requirements.

Whether you need embroidered baseball caps, snapbacks, dad hats, trucker caps, sports caps, or promotional caps, understanding the main parts of a baseball cap will help you create a better custom product for your brand.


FAQs

What are the main parts of a baseball cap?

The main parts of a baseball cap include the crown, panels, brim or visor, closure, eyelets, sweatband, top button, seams, stitching, and logo decoration areas.

What is the crown of a baseball cap?

The crown is the main body of the cap that covers the top of the head. It affects the cap shape, fit, structure, and front logo presentation.

What is the brim of a baseball cap?

The brim, also called the visor, extends from the front of the cap. It helps protect the face from sunlight and affects the cap’s style.

What is the best crown type for embroidery?

A structured crown is usually better for embroidery because it keeps the front panel stable and helps the logo look cleaner.

What is the difference between a 5-panel and 6-panel cap?

A 5-panel cap usually has one large front panel without a center seam, making it suitable for large logos or patches. A 6-panel cap has a classic baseball cap structure with a center seam and a traditional look.

Which closure is best for promotional baseball caps?

Adjustable closures such as snapback, hook-and-loop, or metal buckle are usually better for promotional caps because they fit more head sizes.

Is embroidery better than printing for baseball caps?

Embroidery is more durable and gives a professional textured look. Printing is better for colorful, detailed, or gradient artwork.

Can I customize both the front and side of a baseball cap?

Yes. Most custom baseball caps can support front embroidery, side logo embroidery, back logo placement, brim decoration, and custom labels.

What material is best for custom baseball caps?

Cotton is soft and breathable, making it suitable for casual caps. Polyester is durable and colorfast, making it good for sports caps and promotional caps. Mesh is often used for trucker caps and summer caps.

What should I confirm before bulk cap production?

You should confirm the cap style, material, color, crown profile, brim shape, closure type, logo size, logo method, sample quality, packing details, and delivery time.
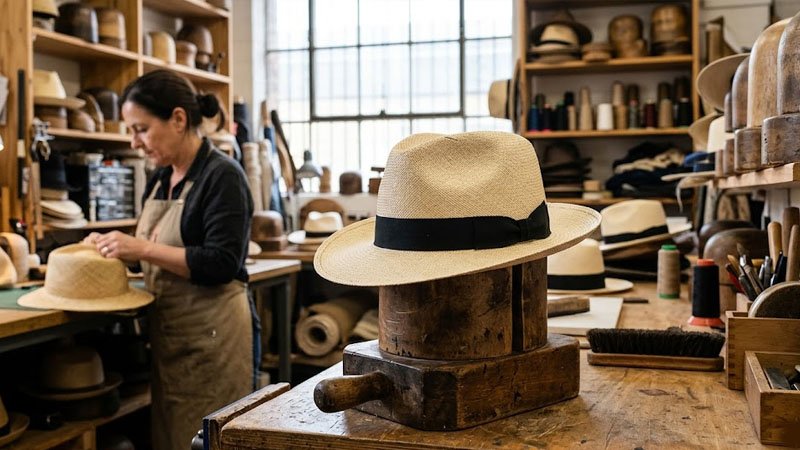
How to Break in a New Hat Without Damaging It

A new hat can look great when you first buy it, but it does not always feel perfect right away. The crown may feel stiff, the sweatband may feel tight, or the brim may not have the shape you want. This is completely normal. Most new hats need a little time to soften, adjust, and fit more naturally.

However, breaking in a new hat should be done carefully. Using too much heat, soaking the wrong material, bending the brim too hard, or putting the hat in a dryer can cause shrinkage, fading, warping, or permanent damage.

The good news is that you can make a new hat fit better without ruining its shape. Whether you are breaking in a baseball cap, fitted cap, snapback, dad hat, trucker hat, bucket hat, wool hat, or another style, the key is to choose the right method for the material and structure.

In this guide, you will learn how to break in a new hat safely, how to soften a stiff crown, how to shape a brim, how to stretch a tight hat, and what mistakes to avoid.


Quick Answer: What Is the Safest Way to Break in a New Hat?

A new hat placed on a head form for safe natural break-in without damaging the shape

The safest way to break in a new hat is to wear it regularly. Your body heat, natural movement, and light moisture will gradually soften the sweatband, crown, and fabric, helping the hat adjust to your head shape.

If you want faster results, use gentle steam, hand shaping, or a hat stretcher. Avoid boiling water, dryers, harsh washing, aggressive bending, and soaking delicate materials such as wool, leather, straw, or structured hats.

For most hats, the best approach is simple: start gently, test slowly, and avoid high heat.


Before You Start: Check the Hat Material

Different hat materials and fabric samples in a custom hat factory for choosing the right break-in method

Not all hats should be broken in the same way. Before using water, steam, heat, or stretching tools, check the hat’s material and care label.

Different materials react differently to moisture and heat. A cotton cap may soften easily with regular wear or light steam, while a wool hat can shrink if soaked in hot water. A leather hat should not be washed like a fabric cap, and a straw hat can crack or lose shape if bent too aggressively.

Here is a simple guide:

Hat Material Recommended Method Avoid
Cotton Regular wear, light steam, gentle hand shaping High heat, dryer
Wool Steam, slow shaping, professional care Hot water soaking, machine washing
Polyester Regular wear, gentle steam, careful shaping Excessive heat
Nylon Regular wear, hand shaping High heat or harsh washing
Leather Leather conditioner, professional care Soaking, machine washing
Straw Gentle hand shaping Water soaking, aggressive bending
Structured caps Steam, careful shaping, hat form drying Dryer, heavy washing, forceful bending

If you are not sure what your hat is made of, choose the safest method first: wear it regularly and shape it gently by hand.


Best Methods to Break in a New Hat Safely

Different hats need different treatments. Below are the most common break-in methods, along with when to use them and what risks to watch for.

Method Best For Time Needed Risk Level
Regular wear Most hats Several days to weeks Low
Hand shaping Brims and crowns A few minutes Low
Steam Stiff crowns, tight sweatbands, brim shaping 10–20 minutes Low to medium
Warm water Cotton caps A few hours Medium
Hat stretcher Tight fitted hats Several hours to overnight Low to medium
Machine wash Washable cotton caps only One wash cycle Medium to high
Sun fading Vintage look Several days Medium

The best method depends on the hat’s material, structure, and the problem you want to solve.


Wear Your Hat Regularly

Person wearing a new baseball cap regularly to naturally break it in for a better fit

The Most Natural Break-In Method

The easiest and safest way to break in a new hat is to wear it often. Just like a new pair of shoes, a new hat may feel stiff at first, but it gradually becomes more comfortable with use.

When you wear a hat, your body heat and natural movement help soften the fabric and sweatband. Over time, the hat begins to follow the shape of your head. This creates a more personalized and comfortable fit.

This method works well for:

  • Baseball caps
  • Dad hats
  • Trucker hats
  • Snapbacks
  • Cotton caps
  • Casual bucket hats
  • Everyday fabric hats

If your hat feels only slightly stiff or snug, regular wear may be enough.

How to Speed It Up Naturally

You can speed up the process by wearing your hat during light daily activities, such as walking, running errands, doing outdoor chores, or wearing it around the house.

A little body heat and light moisture can help relax the sweatband and fabric. However, avoid soaking the hat with heavy sweat too often, especially if it has delicate embroidery, leather patches, printed logos, or dark colors.

How Long Does This Take?

A soft cotton hat may start to feel better after a few wears. A structured cap may take one to two weeks. A fitted hat or wool hat may take longer.

This method requires patience, but it is the safest option and has the lowest chance of damaging your hat.


How to Shape a Hat Brim or Bill

The brim is one of the most visible parts of a hat. If it is too flat, too stiff, or uneven, the whole hat may look uncomfortable or unnatural.

Shaping the brim is one of the easiest ways to make a new hat look and feel better.

Shape the Brim by Hand

Start by holding the brim with both hands. Gently bend it into the curve you want. Work slowly from the sides toward the center.

Do not force the shape all at once. Light pressure is better than aggressive bending.

For a relaxed everyday look, create a soft curve. For a more traditional baseball cap style, create a deeper curve.

If the brim feels very stiff, use steam first to soften it slightly before shaping.

Use a Mug or Can for an Even Curve

For a more consistent curve, wrap the brim around a coffee mug, soda can, or another smooth round object.

Follow these steps:

  1. Gently curve the brim around the object.
  2. Hold it in place with a rubber band if needed.
  3. Leave it for several hours or overnight.
  4. Remove the hat and check the shape.
  5. Repeat if you want a deeper curve.

This method works best for baseball caps, dad hats, and casual caps with flexible brims.

Avoid Over-Bending the Brim

Do not fold the brim sharply in the middle. Do not twist it or bend it backward. If the brim has a stiff insert, aggressive bending can cause cracks, creases, or permanent unevenness.

A good brim shape should look natural, not forced.


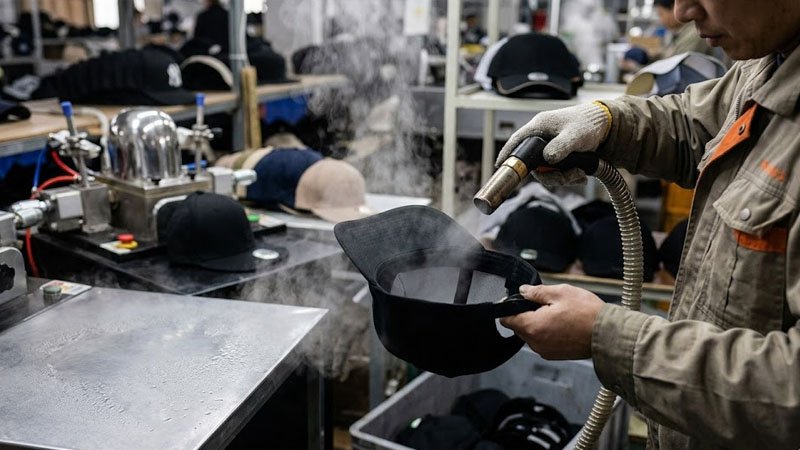
How to Use Steam to Soften a New Hat

Using gentle steam to soften a stiff new hat and reshape the crown safely

Steam is one of the most useful ways to break in a hat faster. It can soften the crown, relax the sweatband, and make the brim easier to shape.

Compared with soaking, steam gives you more control. It adds warmth and moisture without fully wetting the hat.

When to Use Steam

Steam is helpful when:

  • The crown feels stiff
  • The sweatband feels tight
  • The brim is hard to shape
  • The hat needs light reshaping
  • You want faster results than regular wear

Steam works especially well for cotton caps, wool hats, and some structured hats. However, it should still be used carefully.

Step-by-Step Steam Method

  1. Use a garment steamer, kettle, or hot shower steam.
  2. Hold the hat near the steam, not directly against boiling water.
  3. Steam the stiff area for 20–30 seconds at a time.
  4. Gently shape the hat with your hands.
  5. Wear the hat while it cools, or place it on a hat form.
  6. Let it air dry naturally.

Do not over-steam the hat. Too much moisture and heat may weaken glue, affect embroidery, loosen patches, or change the structure.

Can Steam Damage a Hat?

Steam is usually safe when used lightly, but it can damage certain hats if overused. Be careful with leather hats, straw hats, glued patches, delicate trims, and highly structured crowns.

If the hat is expensive, rare, or delicate, consider professional cleaning or reshaping instead.


Can You Use Warm Water to Break in a Hat?

Gently dampening a cotton cap with warm water to soften it while protecting the shape

Warm water can soften some hats, especially cotton caps. However, it is riskier than regular wear or steam.

Water can cause shrinkage, fading, color bleeding, and shape loss if used incorrectly. This method should only be used for hats that can safely handle water.

Warm Water Method for Cotton Caps

If your hat is suitable for water treatment, follow these steps:

  1. Fill a basin with warm water. Do not use boiling water.
  2. Lightly soak or dampen the hat.
  3. Remove the hat and gently press out excess water. Do not twist it.
  4. Wear the hat while it is damp so it can mold to your head shape.
  5. Let it air dry naturally.

This can help a cotton cap become softer and more comfortable.

What to Avoid

Do not soak wool, leather, straw, or structured hats unless the care label says it is safe.

Do not use hot water on hats with dark colors, delicate embroidery, printed logos, leather patches, or cardboard-like brim inserts.

Before wetting the whole hat, test a small hidden area to see if the color runs.


The Shower Method

The shower method is a gentler version of the warm water method. Instead of soaking the hat, you expose it to steam and light moisture.

You can wear the hat during a warm shower, or place it in the bathroom while steam fills the room. Once the hat becomes slightly warm and damp, wear it until it begins to adjust to your head shape.

This method can work for casual cotton caps and some wool hats, but it is not suitable for leather, straw, or hats that should stay dry.

The shower method is useful when you want to soften the hat slowly without fully soaking it.


Should You Machine Wash a Hat to Break It In?

Machine washing can soften some hats, but it is one of the riskier methods. It should only be used when the hat’s care label allows machine washing.

Machine washing may cause shrinkage, fading, loose stitching, warped brims, or crown deformation. It is not recommended for high-end hats, wool hats, leather hats, straw hats, structured caps, or hats with cardboard brims.

How to Machine Wash a Hat Safely

If your hat is washable, follow these steps:

  1. Place the hat in a hat cage or delicate laundry bag.
  2. Use cold or lukewarm water.
  3. Choose a gentle cycle.
  4. Use mild detergent.
  5. Avoid bleach or harsh cleaners.
  6. Remove the hat immediately after washing.
  7. Air dry it on a towel, hat form, or rounded object.

Never put your hat in the dryer. Dryer heat can shrink the fabric, warp the brim, and damage the overall shape.

Better Alternative: Spot Cleaning

If your goal is only to clean and soften the hat slightly, spot cleaning is safer than machine washing.

Use a soft cloth, cool water, and mild soap. Gently clean dirty areas without soaking the entire hat.


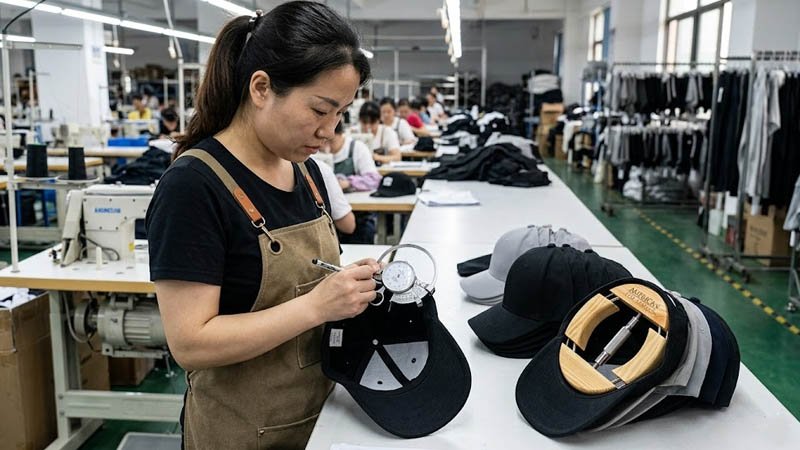
How to Stretch a Tight Hat for a Better Fit

Using a hat stretcher to gently stretch a tight fitted hat for a more comfortable fit

Sometimes a new hat feels too tight even after several wears. In that case, gentle stretching can help.

The key word is gentle. Stretching too quickly can damage the sweatband, seams, panels, or crown shape.

Stretch the Sweatband

If the tightness is mainly around the sweatband, lightly steam or dampen the inside band. Then gently stretch it by hand.

Wear the hat while it cools or dries. This helps the sweatband adjust to your head size.

Do not cut the sweatband unless there is no other option. Cutting can affect the hat’s structure and durability.

Use a Hat Stretcher

A hat stretcher is one of the safest tools for improving fit. It applies even pressure and helps avoid uneven stretching.

To use a hat stretcher:

  1. Lightly steam or dampen the sweatband.
  2. Insert the hat stretcher.
  3. Expand it slowly.
  4. Leave it in place for several hours or overnight.
  5. Try on the hat and repeat if necessary.

This method works especially well for fitted hats that are slightly too tight.

Use a Round Object

If you do not have a hat stretcher, you can place the hat over a clean round object, such as a bowl, jar, or ball.

Make sure the object is only slightly larger than the hat. If it is too large, it may overstretch the hat and distort the shape.


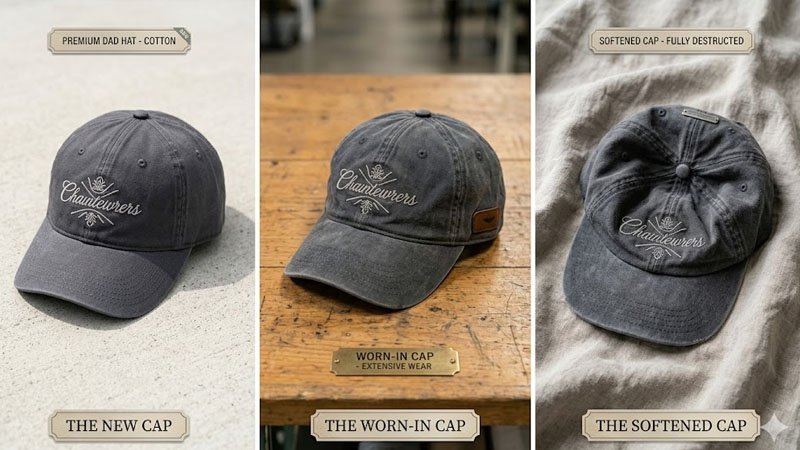
How to Make a New Hat Look Vintage

Some people want their new hat to feel and look worn-in. A vintage look can be created carefully, but it is easy to overdo.

Wear It Often

The most natural vintage look comes from regular wear. Over time, the fabric softens, the color becomes more relaxed, and the hat develops its own character.

This is the safest way to create an authentic worn-in appearance.

Use Sunlight Carefully

Leaving a cotton hat in the sun can create a faded look. However, strong sunlight can cause uneven fading, especially on dark colors.

If you want a subtle vintage effect, expose the hat to sunlight gradually instead of leaving it outside for too long.

Use Fine Sandpaper Lightly

Fine sandpaper can be used to gently distress the brim edge or certain fabric areas.

Use very light pressure. Avoid sanding embroidery, printed logos, patches, seams, or decorative details.

If you want a vintage look without the risk, consider choosing a pre-washed or pre-distressed hat.


What Not to Do When Breaking in a New Hat

Many hats are damaged not because people try to break them in, but because they use methods that are too harsh.

Avoid these common mistakes:

  • Do not use boiling water.
  • Do not put the hat in a dryer.
  • Do not machine wash hats that are not washable.
  • Do not soak leather, straw, or delicate wool hats.
  • Do not bend the brim sharply in the middle.
  • Do not twist or wring the hat when wet.
  • Do not use bleach or harsh detergents.
  • Do not stretch the hat too quickly.
  • Do not leave dark hats in direct sunlight for too long.
  • Do not ignore the care label.

When in doubt, choose the gentlest method first. A slow break-in process is better than permanent damage.


Troubleshooting Common Hat Fit Problems

The Hat Feels Too Tight

Wear it regularly for a few days first. If it still feels tight, use light steam on the sweatband and stretch it gently. A hat stretcher can help if the hat needs a little more room.

The Crown Feels Too Stiff

Use steam to soften the crown, then shape it gently with your hands. Wearing the hat often will also help the crown relax naturally.

The Brim Is Too Flat

Shape the brim by hand or wrap it around a mug or can for several hours. If the brim is stiff, use light steam before shaping.

The Hat Shrunk After Washing

Lightly steam the hat or dampen it with warm water, then stretch it carefully while it is still damp. Let it air dry on your head or on a hat form.

The Hat Lost Its Shape

Use steam to soften the fabric, then reshape it by hand. Place the hat on a rounded object, towel, or hat form while it dries.

If the hat is expensive, delicate, or badly misshapen, professional reshaping may be the safest option.


How Long Does It Take to Break in a New Hat?

Different types of hats showing how break-in time depends on material, structure, and fit

The time depends on the material, construction, and how often you wear it.

A soft cotton dad hat may feel better after a few wears.

A structured baseball cap may take one to two weeks.

A fitted cap may need several wears plus gentle stretching.

A wool hat may take longer and should be shaped carefully with steam.

A stiff or high-crown cap may take more time because the structure is designed to hold its shape.

In general, regular wear is the safest method, while steam and gentle stretching can speed up the process.


For Brands: Better Comfort Starts with Better Hat Design

For brands, retailers, and businesses ordering custom hats in bulk, the break-in experience begins long before the customer wears the hat. Fabric weight, sweatband softness, crown height, panel structure, brim flexibility, embroidery density, stitching quality, and finishing process all affect how comfortable a hat feels from the first wear.

As a Guangzhou-based high-end custom hat and OEM/ODM manufacturer with 15 years of experience, GUANGZHOU EASTLUCKY Hat & Garment Co., Ltd. understands that comfort starts at the production stage. Guided by the philosophy “Quality as Root, Innovation as Soul,” EASTLUCKY provides global clients with one-stop solutions from design sampling to mass production, helping brands build efficient and high-quality hat supply chains.

For custom hat projects, brands can improve the customer experience by choosing the right fabric, sweatband, brim insert, crown structure, and fit testing process. A well-designed hat should look good, hold its shape, and become comfortable with minimal break-in time.


Hat Care After Breaking It In

Once your hat fits well, proper care helps it stay comfortable and keep its shape longer.

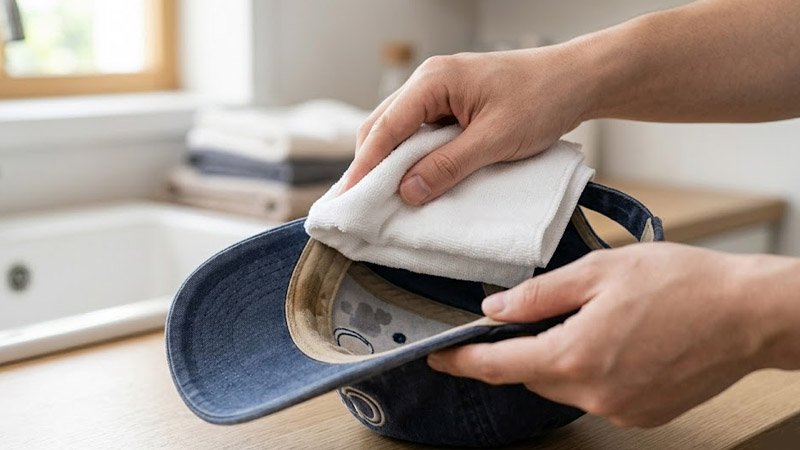
Clean It Gently

Spot cleaning is usually the safest method. Use a soft cloth, mild soap, and cool water. Avoid harsh chemicals, bleach, and abrasive brushes.

If deeper cleaning is needed, always check the care label first.

Store It Properly

Do not crush your hat in a drawer or bag. Store it on a shelf, hat rack, or clean surface where the crown and brim can keep their shape.

For structured hats, use a hat form or support the crown with soft paper.

Avoid Excessive Heat and Moisture

Too much sun, rain, sweat, or heat can shorten the life of a hat. Let sweaty hats dry naturally before storing them.

If you wear hats often, rotate between different styles to reduce wear and maintain shape.


FAQs

What is the safest way to break in a new hat?

The safest way is to wear it regularly. Body heat and natural movement will gradually soften the hat and help it fit your head without much risk of damage.

How do you break in a baseball cap?

Wear it often, shape the brim gently by hand, and use light steam if the crown or brim feels stiff. Avoid dryers, boiling water, and aggressive bending.

Can you break in a fitted hat?

Yes. A fitted hat can be broken in by regular wear, light steam, and gentle stretching. If it is slightly too tight, a hat stretcher can help.

Will breaking in a hat make it bigger?

Breaking in a hat may make it feel slightly roomier because the sweatband and crown relax over time. However, it will not increase the size dramatically. If the hat is much too small, it is better to choose a larger size.

Can I use water to break in a new hat?

Warm water can be used on some cotton hats, but it should be done carefully. Avoid soaking wool, leather, straw, structured hats, or hats with delicate decorations.

Can steam damage a hat?

Light steam is usually safe for many hats, but too much steam can damage glue, patches, embroidery, or structured panels. Use short bursts of steam and shape the hat gently.

Should I put my hat in the dryer?

No. A dryer can shrink the fabric, warp the brim, and damage the hat’s shape. Always air dry your hat naturally.

How do I make a stiff hat softer?

Wear it regularly, use light steam, or gently dampen the sweatband if the material allows it. Avoid harsh washing or high heat.

How do I curve a hat brim?

Use your hands to bend the brim gently, or wrap it around a mug or can for several hours. Do not fold or crease the brim sharply.

How long does it take to break in a new hat?

It can take a few days to a few weeks, depending on the material and structure. Soft cotton hats usually break in faster, while structured or fitted hats may take longer.


Conclusion

Breaking in a new hat does not have to be difficult, but it should be done carefully. The safest method is regular wear, while steam, hand shaping, warm moisture, and gentle stretching can help speed up the process.

The most important rule is to match the method to the material. Cotton caps can usually handle more moisture, while wool, leather, straw, and structured hats need extra care. Avoid boiling water, dryers, harsh washing, and aggressive bending if you want to protect the hat’s shape, color, and durability.

With the right approach, your new hat can become softer, more comfortable, and better fitted without being damaged. A good hat should not only look great on the first day, but also become even better with time.

High-End Hat Cleaning Tips: Preserve Shape and Quality with a Hat Cage

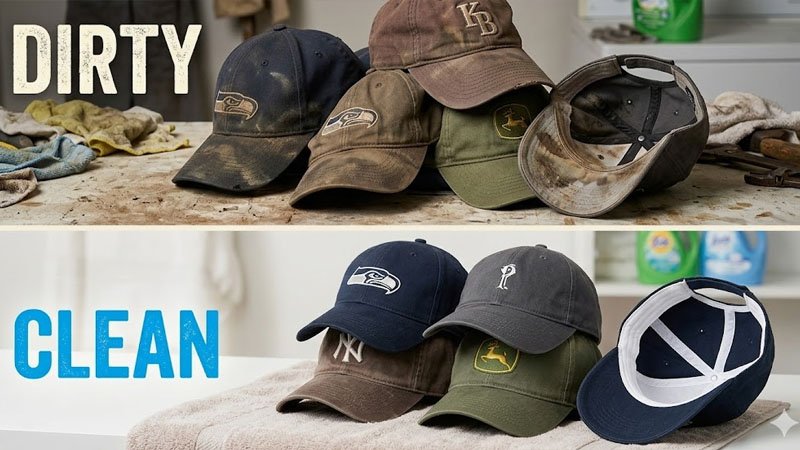
Cleaning your hats can feel intimidating, especially when you want to maintain their shape and appearance. With the right tools and methods, your hats can stay clean, stylish, and perfectly shaped. Using a hat cage is one of the most effective ways to protect your hats during washing. This guide will walk you through everything you need to know—from preparation to drying—and includes expert tips to help your headwear last longer.


Why Cleaning Your Hat Matters

Baseball cap with sweat stains showing why regular hat cleaning is important

Hats are more than just fashion accessories—they protect us from sun exposure and environmental elements. Over time, hats collect sweat, dirt, and odors, which can cause discoloration, fabric wear, and a worn-out appearance. Regular cleaning preserves both the shape and color, extending the life of your hats.

Tip: Rotate Your Hats

If you wear hats often, try rotating them regularly. This reduces wear in high-contact areas like the sweatband and prevents odor buildup, keeping each hat fresher for longer.

Different hats—baseball caps, wool hats, or vintage styles—require unique care. Knowing the right method for your hat ensures it remains attractive and functional.


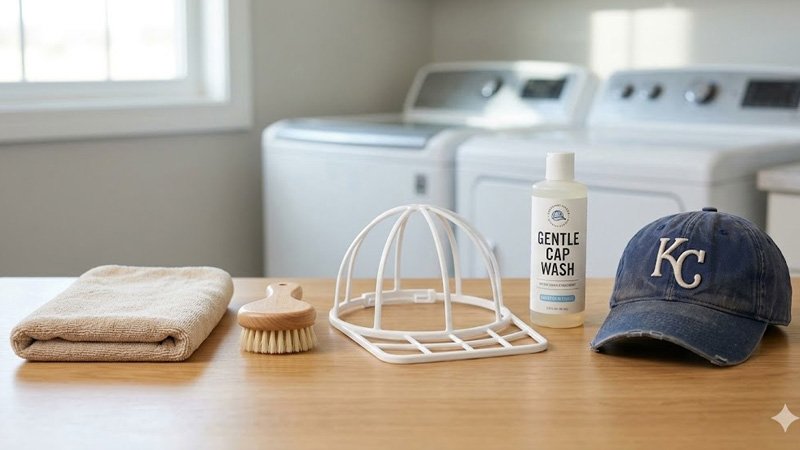
Preparing to Wash Your Hat

Supplies needed to wash a hat including hat cage detergent soft brush and towel

Before washing, gather your materials and carefully inspect your hat. This ensures a smoother, safer cleaning process.

Supplies You’ll Need

Check Your Hat

  1. Inspect for stains, discoloration, or delicate areas.

  2. Conduct a color fastness test: apply soapy water to a hidden area and wipe with a white cloth to see if any dye bleeds.

  3. If colors hold, your hat is ready to wash.

Tip: Spot Treat First

For tough stains like makeup, sweat, or oil, pre-treat the area with a small amount of detergent and gentle rubbing before soaking. This helps avoid long-term discoloration.


Washing Your Hat

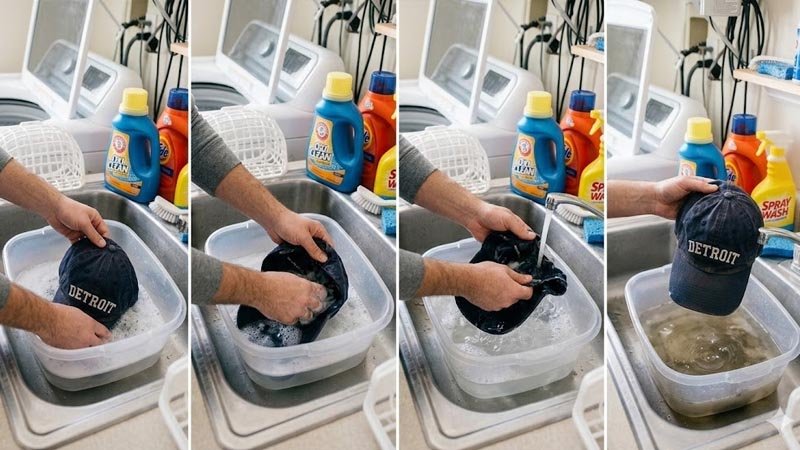
Hand washing a baseball cap in lukewarm water with mild detergent

Hand Washing Steps

  1. Fill a bucket with lukewarm water.

  2. Add a small amount of mild detergent and stir until dissolved.

  3. Soak the hat for 5 minutes.

  4. Gently agitate the water with your hands to lift dirt—avoid scrubbing hard, which may damage the fabric.

Using a Hat Cage

Tip: Use Gentle Circular Motions

When brushing or rubbing stains, move in small circles instead of back-and-forth scrubbing. This preserves the fabric and prevents deformation.

Rinsing

Tip: Multiple Rinses

For hats with thicker fabric or heavier detergent, rinse 2–3 times. Leftover soap can cause stiffness or discoloration over time.


Drying Your Hat

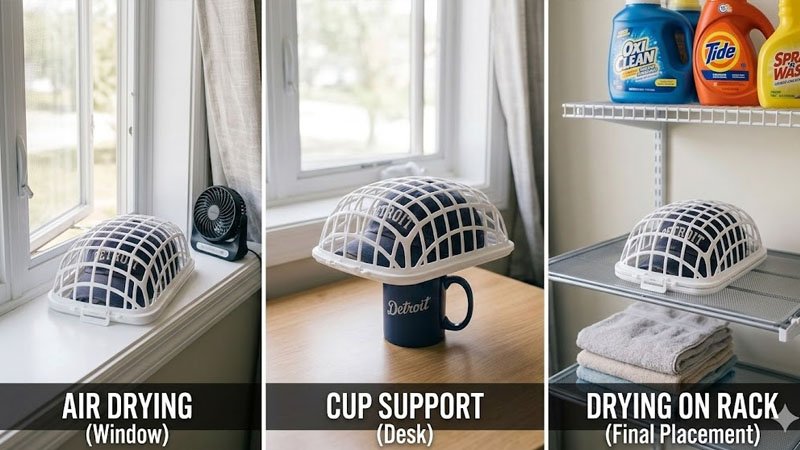
Air drying a baseball cap in a hat cage to maintain its original shape

Patting Dry

Air Drying

Tip: Use a Fan for Faster Drying

If your hat is thick or wool, placing a fan nearby (without direct heat) can speed up drying while keeping the hat in shape.

Tip: Refresh Between Wears

Spray hats lightly with water or a hat-safe fabric refresher between washes. This removes light odors and sweat, reducing the need for frequent washing.


Additional Hat Care Tips

Proper hat storage using hat rack to keep caps in perfect shape

Tip: Store Hats Properly

Use a hat stand, box, or shelf to preserve shape. For travel, a hat cage or hard case keeps your hat protected in luggage.

Tip: Maintain Sweatbands

Wipe sweatbands regularly with a damp cloth. This prevents odor buildup and extends the overall life of the hat.

For brands or individuals seeking professional-quality headwear solutions, GUANGZHOU EASTLUCKY Hat & Garment Co., Ltd. provides high-end custom hat manufacturing and OEM/ODM services. With 15 years of expertise in R&D, production, and distribution, we offer one-stop solutions for hats and embroidered accessories, ensuring your headwear stays stylish, durable, and high-quality.


Conclusion

Proper washing, drying, and storage are essential for preserving your hats’ shape, color, and longevity. Using a hat cage ensures your headwear remains in top condition, ready to wear for years to come. By following these tips, including small care habits and extra steps for stains and sweatbands, your hats will always look fresh, professional, and perfectly shaped.